
Every year since we've moved to this location (2002), we've worked on at least one major outdoor landscaping project each spring a/o summer. When we got our new house in 2010, we had to re-structure some of the landscaping around the property. After working on the property for 10 years, I feel like our backyard is now about where we want to it to be, but I felt like the front was lacking some major curb appeal. I've added minor things to it each year--in 2010, I had a hanging plant. In 2011, I had another hanging plant and a big pot of flowers by the front door. In 2012, I bought 4 more large pots and added flowers along the front. And this year, I decided it was time to do invest in the area and add something more.
I'd been thinking for a while about what I could do--in front of our old house we used to have a rounded area filled with red lava rock and antique equipment and ornamental spruce trees. But because this house is a lot wider, there's not a lot of room in front to put in any landscaping of that size without taking out needed driveway space. There's also not any water access in front, so I knew that we couldn't add a lot more plants. The area definitely needed some color though--because our gray house next to all the gray gravel was boring and not very inviting.

So--I came up with a design in my head of a long narrow area in front of the house outlined in orange brick, that would be filled with red lava rock, and large charcoal-colored shale stones set in between the existing flower pots for contrast. During the first week of July, we worked on the project for 3 days.
Step 1: Obtain the brick
I didn't want to spend a lot of money on this landscaping project, so I looked for cheaper alternatives, thus the idea to use brick instead of landscape borders or lumber. I noticed a house on the way to town that had a huge pile of brick in the yard, so one day, I stopped by and asked the lady if she'd be willing to sell me some. She said she would sell the used brick at 10cents each. I came home, measured the area, and divided that length by the size of the brick to determine how many I needed. Unfortunately, I added one section twice into my equation without realizing, so I figured we needed about 160 brick. Josh went back to the nice lady's house with me, and we loaded up 200 bricks (we got a little extra). It was hot outside and we spent 1/2 hour picking the best brick out of the pile and loading them into the truck. It was a tiring project! When we got home, Josh re-measured the space and we realized we only needed about 120 bricks instead (so now we have PLENTY of extra!)! The boys unloaded the bricks for us from the truck into 3 wheelbarrows and 2 wagons.

Step 2: Create outline for the project area
We made some measurements to figure out how far out from the house we wanted the brick line to be placed. Then Josh went along with a shovel, and created a rough line for me by using a shovel to dig out the gravel down to the dirt. He and I also dug out some of the existing gravel rock inside the rough line so that there would be less gravel, creating more room to fill with red lava rock later.

Step 3: Remove the mortar from bricks
The bricks I bought from the woman had originally been on a building that was torn down in town a few years ago, so almost all the bricks had mortar stuck to them. In order to create an exact line with them, I had to hammer off all the extra mortar on each brick. This was very time-consuming and required patience because if you hammered the bricks too hard to remove the mortar, it could break the brick. I worked on it while sitting on the front porch and I got tired of this project, so I would work until I had 15 done, then I would place them on the rough line and take a little break before doing the next 15. Josh took pity on me after a while, and he did a few loads of hammering mortar too.


Step 4: Align the brick edging
This was the most time-consuming part of this project, and I admit that because I'm a little OCD, it was also my favorite part. I measured out from the house before placing each brick so that they would be in an exact straight line. I also wanted them be level with each other, so I had to dig out areas under/around each individual brick so that they would lay just right. There were some major rocks under the previous gravel bed that were difficult to remove and then I had to create some fill under the brick to ensure that it was level which became frustrating at times. It took me about 6 hours total to complete this portion of the project, but the outline looked SO good when I was done that it was definitely worth it! The brick was the perfect outline for this project, and it fits in the surroundings better than lumber or pre-made landscaping borders would have.


Step 5: Obtain large shale rocks
A few miles from our home are some mountain sides covered in shale rocks. Some of the rocks are red/orange--which are the type of rocks that are placed under each flower pot, and some of the rocks are gray/black--which is the type of rock I wanted to add in between the flower pots. Josh and I went on a drive one evening to pick out some good-sized, unique rocks. We walked/hiked along the side of the mountain and rolled down the ones we wanted to keep and then loaded them into the truck. It only took us about 20 minutes and we picked out 12 rocks. I was so happy with our assortment, and the best part was they were free with just a little muscle power! The next morning, Ammon helped me unload the heavy rocks so I could randomly place them in the project area.

Step 6: Fill with red lava rock
This was the last step of the project, and the most expensive part. Josh & I took his dad's old dump truck to the landscaping store in town and ordered one scoop of the red lava rock--which cost $50. We brought the load home, and Josh backed up the truck to the area and then parked the bed of the truck at a slant so that it would be easier to scoop out the rock. Jonah & Ammon grabbed shovels and helped Josh shovel the rock evenly into the area. Kanyon & Micah helped me pick up red rocks that fell onto the gravel and we threw them into the area, too.


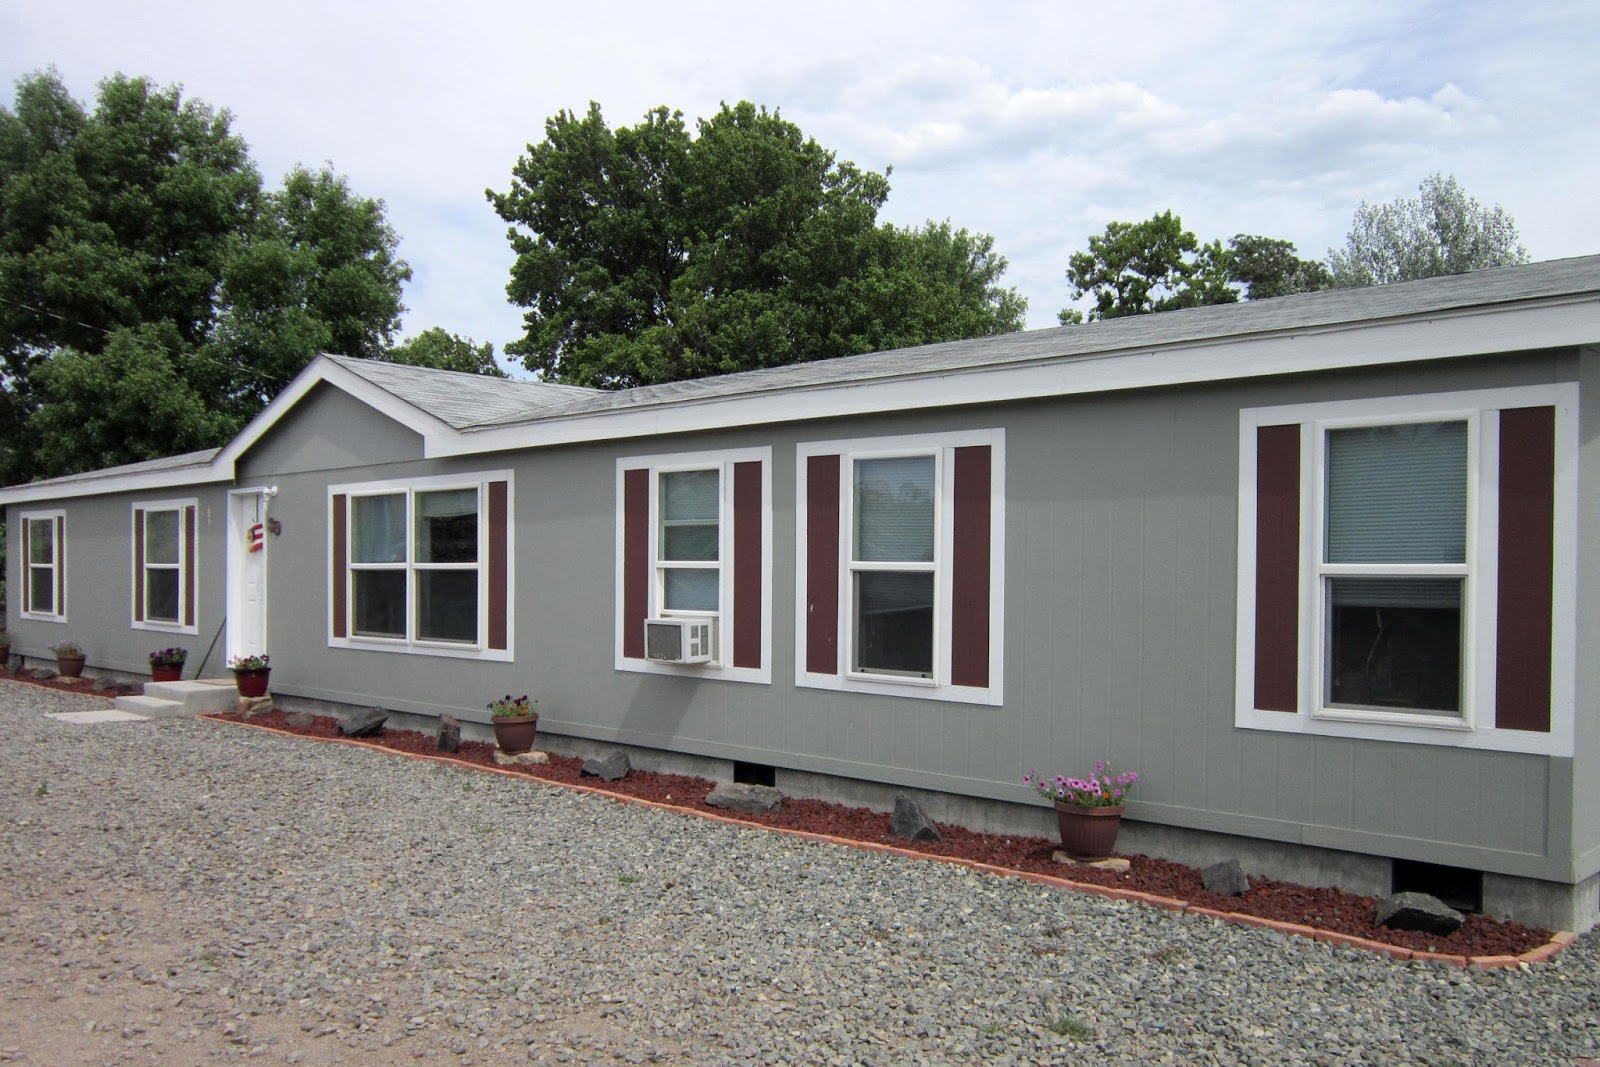
I love the final effect--it's not very dramatic, but the project added color and texture to the front of the house. The $70 spent created some much-needed curb appeal, and it is now so much more inviting. The red rock matches the trim on the house, the black shale rock creates visual interest to the area, and the brick outline is very precise and defines the space! I'm so grateful for Josh and the boys' help in making the vision in my head become a reality! I love driving up and seeing the front of our house now!
BEFORE the project:

AFTER the project:

Our home in 2011:

Our home in 2013:
1 comment:
Wow! Looks great!
Post a Comment